How to Resize an Image on iPhone in Easy Simple Steps

Taking photos with your iPhone is fun and easy, but sometimes you need to make those pictures smaller or bigger. Maybe you want to share a photo on social media, send it through email, or save storage space on your phone. Learning how to resize an image on iPhone is a useful skill that every iPhone user should know.
In this guide, we’ll show you exactly how to resize photos on your iPhone using different methods. Whether you want to resize photos on iPhone without cropping or need to make major size changes, we’ve got you covered with simple, step-by-step instructions.
After editing images, try using the best browsers for iPhone in 2025 for smoother performance.
What Does It Mean to Resize an Image?
Before we jump into the how-to steps, let’s understand what resizing means. When you resize an image, you’re changing its dimensions – making it smaller or larger. This is different from cropping, which cuts parts of the image away.
Image resizing changes the overall size of your photo while keeping the entire picture intact. Think of it like shrinking or enlarging a piece of paper – the content stays the same, but the size changes.
Why Would You Want to Resize Photos on iPhone?
There are many reasons why people need to resize images on their iPhones:
Social Media Sharing: Different social platforms have specific size requirements. Instagram prefers square images, while Facebook timeline photos work best in landscape format.
Email Attachments: Large photo files can be too big to send via email. Resizing makes them smaller and easier to share.
Storage Space: Smaller image files take up less space on your iPhone, helping you save storage for more photos and apps.
Website Usage: If you run a blog or website, you might need images in specific sizes for better loading speeds.
Printing: Sometimes you need to resize photos to fit specific print sizes like 4×6 or 8×10 inches.
|| Also read How to Pause Your Location on Find My iPhone Without Notifying Others.
Built-in iPhone Methods to Resize Images
Your iPhone comes with several built-in ways to resize photos. Let’s explore each method about How to Resize an Image on iPhone, in detail.
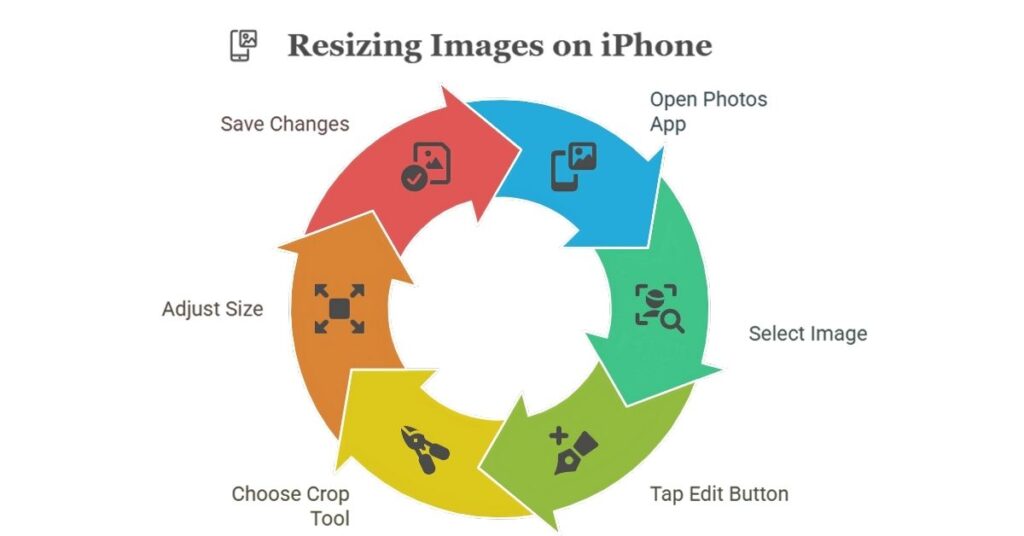
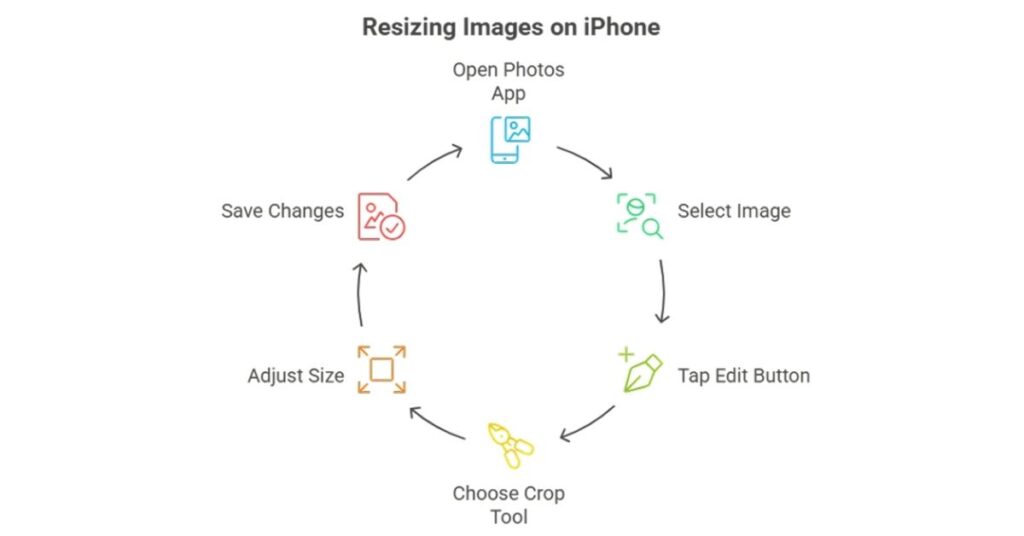
Method 1: Using the Photos App
The Photos app on your iPhone has basic resizing capabilities through the editing tools.
Step 1: Open the Photos app on your iPhone.
2: Find and tap on the photo you want to resize.
3: Tap the “Edit” button in the top right corner.
4: Look for the crop tool icon at the bottom of the screen.
5: Tap the crop tool to access resizing options.
6: Use the corner handles to adjust the image size while maintaining the aspect ratio.
7: Tap “Done” when you’re satisfied with the new size.
This method works well for basic resizing, but it has limitations. You can’t specify exact dimensions, and the options are somewhat limited compared to dedicated apps.
Method 2: Using the Mail App Trick
One clever way to resize photos on iPhone involves using the Mail app’s automatic compression feature.
Step 1: Open the Photos app and select the image you want to resize.
2: Tap the share button (the square with an arrow pointing up).
3: Choose “Mail” from the sharing options.
4: Add your own email address as the recipient.
5: Before sending, you’ll see size options like “Small,” “Medium,” “Large,” or “Actual Size.”
6: Choose the size that best fits your needs.
7: Send the email to yourself.
8: Open the email and save the resized image back to your Photos app.
This method is great because it gives you specific size options and works with the tools already on your iPhone.
|| Also read Best iPhone 14 Pro Case with Card Holder – Stylish Protection.
Method 3: Using the Shortcuts App
The Shortcuts app offers more advanced resizing options for power users.
1: Download the Shortcuts app if you don’t already have it.
2: Create a new shortcut by tapping the “+” button.
3: Search for “Resize Image” action and add it to your shortcut.
4: Set your desired width and height in pixels.
5: Add a “Save to Photo Album” action after the resize action.
6: Save your shortcut with a memorable name like “Resize Photo.”
7: To use it, share any photo to your new shortcut.
This method gives you precise control over image dimensions and can be reused whenever you need to resize photos.
How to Resize Photos on iPhone Without Cropping
Many people want to resize images on iPhone without losing any part of the picture. Here are the best methods to achieve this.
Understanding Aspect Ratios
When you resize photos without cropping, you need to maintain the original aspect ratio. This means keeping the same relationship between width and height. If you don’t maintain the aspect ratio, your photo might look stretched or squished.
Using Third-Party Apps for Non-Cropping Resize
While built-in iPhone tools are limited, several free apps specialize in resizing without cropping.
Image Size App: This free app lets you resize images by percentage or specific dimensions while maintaining quality.
Photo Compress & Resize: Offers batch processing and multiple size options without cropping.
Squash: Focuses on compression and resizing with quality preservation.
Step-by-Step Guide Using Image Size App
1: Download Image Size from the App Store (it’s free).
2: Open the app and tap “Select Photo.”
3: Choose the image you want to resize from your photo library.
4: The app will show current dimensions and file size.
5: Choose either “Pixel” or “Percentage” resizing mode.
6: Enter your desired dimensions or percentage.
7: Make sure “Maintain Aspect Ratio” is checked to avoid cropping.
8: Tap “Resize” to process the image.
9: Save the resized image to your Photos app.
Advanced iPhone Image Resizing Techniques
For users who need more control over their image resizing, these advanced techniques provide professional-level results.
Batch Resizing Multiple Photos
Sometimes you need to resize many photos at once. Here’s how to do batch resizing efficiently.
Using the Shortcuts App for Batch Processing:
1: Create a shortcut with the “Select Photos” action.
2: Add the “Resize Image” action with your preferred dimensions.
3: Include a “Save to Photo Album” action.
4: Run the shortcut and select multiple photos to resize all at once.
Resizing for Specific Purposes
Different uses require different sizing approaches for all networks:
For Instagram Posts: Square format (1080×1080 pixels) works best for feed posts.
Instagram Stories: Vertical format (1080×1920 pixels) is ideal.
Email: Usually 600-800 pixels wide is sufficient and loads quickly.
For Printing: Higher resolutions (300 DPI) are needed for quality prints.
|| also read Easy ways to block any website on your iPhone.
Maintaining Image Quality While Resizing
When you resize images, quality can suffer if not done properly. Here are tips to maintain the best quality:
Start with High-Resolution Originals: Always resize from the highest quality version available.
Use Appropriate Compression: Balance file size with visual quality.
Avoid Multiple Resizing: Each resize reduces quality, so get it right the first time.
Choose the Right Format: JPEG for photos, PNG for graphics with transparency.
Common iPhone Image Resizing Problems and Solutions
Even with the best methods, you might encounter some issues. Here are common problems and their solutions.
Problem 1: Blurry Images After Resizing
Cause: Over-compression or poor resizing algorithm.
Solution: Use apps with better algorithms like Image Size or Photo Compress & Resize. Start with higher quality originals.
Problem 2: Images Look Stretched or Distorted
Cause: Not maintaining aspect ratio during resize.
Solution: Always keep the “Maintain Aspect Ratio” or “Constrain Proportions” option enabled.
Problem 3: File Size Doesn’t Change Much
Cause: The image might already be compressed, or you’re not reducing dimensions enough.
Solution: Check the original file size and make more significant dimension changes if needed.
Problem 4: App Crashes During Resizing
Cause: The image file might be too large or corrupted.
Solution: Try closing other apps to free up memory, or use a different resizing method.
Best Practices for iPhone Image Resizing
Follow these best practices to get the best results when resizing images on your iPhone.
Keep Original Copies
Always save a copy of your original high-resolution image before resizing. Once you resize and save over the original, you can’t get that quality back.
Choose the Right Dimensions
Think about how you’ll use the resized image:
- Web use: 72-96 DPI is sufficient
- Print use: 300 DPI for best quality
- Social media: Each platform has preferred dimensions
Test Different Methods
Different resizing methods work better for different types of images. Portrait photos might work better with one method, while landscape photos work better with another.
Consider Your iPhone Storage
If storage space is a concern, you might want to replace original large files with smaller versions. However, keep in mind that you can’t easily go back to the original size.
Alternative Solutions and Workarounds
Sometimes the standard methods don’t work perfectly for your needs. Here are some alternative approaches.
Using Cloud Services
Services like Google Photos, iCloud, or Dropbox often automatically create different sized versions of your photos. You can download these smaller versions when needed.
Third-Party Photo Editing Apps
Apps like VSCO, Snapseed, or Adobe Lightroom Mobile offer more advanced resizing options along with other editing features.
Using Your Computer
If you have access to a computer, you can transfer photos via AirDrop or iCloud and use desktop software for more precise resizing.
Online Resizing Tools
Several websites offer free image resizing. You can upload photos from your iPhone’s browser, resize them online, and download the results.
Tips for Different iPhone Models
Different iPhone models might have slightly different interfaces or capabilities.
Older iPhone Models (iPhone 6, 7, 8)
These models work with all the methods mentioned but might process images more slowly. Be patient during resizing operations.
iPhone X and Later
These models have more processing power and can handle batch operations more efficiently. The interface might look slightly different due to the notch design.
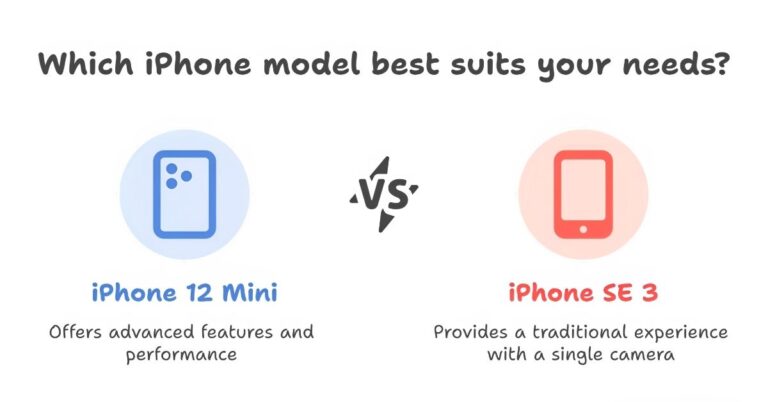
iPhone Pro Models
Pro models often have better cameras with larger file sizes. You might need to resize more frequently to manage storage space.
|| Also read iPhone SE 4 vs iPhone 16–Which Apple Device Reigns Supreme?
Understanding Image Formats and Compression
When resizing images on iPhone, it’s important to understand different formats and how they affect your results.
JPEG Format
JPEG is the most common format for photos. It uses compression that can reduce quality but creates smaller file sizes. Most iPhone photos are saved as JPEG.
HEIC Format
Newer iPhones use HEIC format by default. This format provides better compression than JPEG while maintaining quality. However, not all devices and platforms support HEIC.
PNG Format
PNG format preserves image quality perfectly but creates larger file sizes. It’s better for graphics and images with transparency.
Choosing the Right Format for Resizing
For most photo resizing needs, JPEG works well. If you need perfect quality and file size isn’t a concern, consider PNG. HEIC is good for keeping on your iPhone but might need conversion for sharing.
Frequently Asked Questions
How do I resize a photo on my iPhone without losing quality?
To resize photos on iPhone without losing quality, use apps like Image Size or Photo Compress & Resize. Always start with the highest quality original and maintain the aspect ratio during resizing. Avoid resizing the same image multiple times.
Can I resize photos on iPhone without cropping free?
Yes, you can resize images on iPhone without cropping using free methods. The built-in Shortcuts app allows free resizing, and apps like Image Size offer free resizing without cropping. The Mail app trick also works for basic resizing without cutting parts of the image.
How can I resize a photo on my iPhone for email?
To resize photos for email, use the Mail app’s built-in compression. When you attach a photo to an email, iOS will ask you to choose a size option like Small, Medium, or Large. Choose the size that balances quality with file size for email delivery.
What’s the difference between resizing and cropping?
Resizing changes the overall dimensions of an image while keeping all content visible. Cropping removes parts of the image to change its size or aspect ratio. When you resize, the entire image gets smaller or larger. When you crop, you cut away portions of the image.
How to resize photos on iPhone without cropping free apps?
Several free apps can resize photos without cropping: Image Size (completely free), Photo Compress & Resize (free with optional premium features), and the built-in Shortcuts app. These apps maintain the full image while changing its dimensions.
Why do my resized images look blurry?
Resized images can look blurry due to over-compression, poor resizing algorithms, or making images larger than their original size. To avoid blur, use quality apps, start with high-resolution originals, and avoid enlarging images beyond their original dimensions.
Can I resize multiple photos at once on iPhone?
Yes, you can batch resize photos using the Shortcuts app or certain third-party apps. Create a shortcut with resize actions, or use apps like Photo Compress & Resize that support batch processing for multiple images simultaneously.
How do I know what size to make my images?
The right size depends on your intended use:
- Instagram posts: 1080×1080 pixels
- Instagram stories: 1080×1920 pixels
- Email: 600-800 pixels wide
- Web use: 72-96 DPI
- Printing: 300 DPI
- Facebook cover: 820×312 pixels
Will resizing photos save storage space on my iPhone?
Yes, resizing photos to smaller dimensions will reduce file sizes and save storage space. However, make sure to keep copies of important original images before resizing them, as you can’t restore the original quality once it’s reduced.
How to resize images on iPhone using built-in tools only?
Using only built-in iPhone tools, you can resize images through the Photos app’s crop tool, the Mail app’s compression options, or the Shortcuts app’s resize actions. The Mail app method is often the easiest for basic resizing needs.
Conclusion
Learning how to resize an image on iPhone is an essential skill for modern smartphone users. Whether you need to resize photos on iPhone without cropping for social media, reduce file sizes for email, or prepare images for printing, the methods we’ve covered will help you achieve your goals.
The key points to remember are:
- Use the Photos app for basic resizing needs
- Try the Mail app trick for quick size adjustments
- Explore the Shortcuts app for advanced control
- Consider third-party apps for professional results
- Always maintain aspect ratios to avoid distortion
- Keep original copies of important images
Start with the simpler methods like the Mail app technique, then explore more advanced options as you become comfortable with the process. With practice, resizing photos on your iPhone will become second nature.
Remember that different situations call for different resizing approaches. Social media sharing might need different dimensions than email attachments or printing. Take time to understand your specific needs and choose the method that works best for each situation.
By mastering these iPhone image resizing techniques, you’ll have more control over your photos and be able to share them more effectively across different platforms and purposes. Whether you’re a casual user or someone who works with images regularly, these skills will serve you well in managing your iPhone’s photo library.
5 Comments